Wednesday, January 26, 2011

Fun, Easy Homemade Crafts and Activities for Children!

Being a stay at home mom to an energetic toddler, I need to be well-prepared with lots of activities and crafts that we can do at home to keep his little hands busy and out of things that he isn't allowed to be in! :)  I've found some things that he loves doing that I want to share with all you moms out there looking for crafts and activities to keep your children entertained.  I realize that a lot of moms don't have the opportunity to stay home every day with your children, but most of these things are very easy and don't take a lot of time, so it can be something done in the evenings or weekends with your kids.  And not only are these fun things for your children, but they are very inexpensive for the "thrifty" mom and also safe, eco-friendly things as well, for all of you earth conscious mommies like myself! :)

_________________________________________________________________________________

One of the staples of our daily activities is PLAYDOUGH!  What kid doesn't love to play with Playdough??  I have fond memories of my childhood at home with my mom, playing with her ever so special homemade playdough. So, of course, that's the first thing I would like to share.  There are many variations to homemade playdough recipes that can be found online, but the one I use is what I got from my mom.

"Mom's Homemade Playdough" 
Materials

  • Bowl
  • 1 cup cold water
  • 1 cup salt
  • 2 teaspoons vegetable oil
  • food coloring
  • 3 cups flour
  • 2 tablespoons cornstarch
  • if you feel like getting really crazy with your playdough, you can even go as far as to add glitter, confetti or other fun additions to it!
Directions
  1. In bowl, mix water, salt, oil, and enough food coloring to make a bright color.
  2. Gradually add flour and cornstarch until the mixture reaches the consistency of bread dough.
  3. Store covered. (I reuse clean plastic peanut butter jars to store it in...but a ziploc bag would work too)
And there you have it...easy as that!  I know it's convenient to just go to the store and buy playdough, but I really love this, because it's something your children can help you make, it's free of chemicals, and it's so much more fun for a child when they have a hands-on experience in making it, then getting to play with it!  And while I don't recommend letting your child eat playdough, it is safe if ingested!

traditionalplaydough


_________________________________________________________________________________

The next thing I would like to share is a great thing if you have a little explorer like I do who loves the outdoors and all of the creepy crawlies that come with it! I've found that with just a few simple items, we could make a fun "bug jar" to put all of the little insects and bugs into that he finds out and around the yard.


Ƹ̵̡Ӝ̵̨̄Ʒ  Bug Jars Ƹ̵̡Ӝ̵̨̄Ʒ 

Materials
  • clean jar with lid (I reused an old baby food jar, but any jar would work...peanut butter jars, mason jars, spaghetti sauce jars, etc.)
  • colorful bug stickers (I had foam bug stickers on hand, so that's what I used)
  • ice pick or screwdriver (for punching holes in the jar lid)
Directions
  1. Let your child place stickers onto the jar.
  2. Poke holes with ice pick/screwdriver into jar lid as breathe holes for bugs.  (I don't recommend letting your child help with this step for obvious reasons...ice picks are dangerous in little hands!!)


And that's it!  It's a fun, inexpensive item to give to your child for a day of outdoor exploring and bug catching!  (I even made up a little "buggy quote" and put it on a piece of paper and glued it to the front for a little bit more fun!)

__________________________________________________________________________________

The next thing is a favorite of my little guy!  He has a fascination with animals of all kinds and loves to look through books with pictures of animals.  After searching for and buying numerous animal books for him, I decided to take it upon myself to come up with a way to make a book of his most favorite animals.  So, after just a few easy steps, I managed to make up a fun little book for him that he adores. 

Animal Book

Materials
  • small picture album book with plastic insertable pages
  • pictures of animals printed from computer

Directions
  1. Print pictures of your child's favorite animals from your computer's clip art or from pictures online
  2. Cut pictures down to size of pages of the photo album

I let my son pick out the pictures of the animals he wanted, and I then let him help insert them into the pages.  If your child loves animals as much as mine, this will be a huge hit!  My son sits and looks through this book for extended amounts of time!   It was a simple, cheap way to get a book full of the specific animals that he adores and it was a fun way for mommy to give him something that he loves! :)

__________________________________________________________________________________

The next thing is a fun craft that I shared just recently with the children at our church, after trying it out here at home with my son.  Being a devout Christian family, we instill Christian values in our son's life.  Among these things is saying at blessing at our mealtime.  With my son being such a young age, it's hard for him to say too many blessings, but we have found one that he loves.  In our church, we have taught the children to sing the Johnny Appleseed song before snacks, so that's the song we chose to teach our son for his mealtime blessing.  In an attempt to remind him of his blessing as he grows older and learns to read, but in the meantime, just give him a friendly reminder of singing his blessing, I decided to come up with a craft we could make that included his blessing.  Below is a picture of what he and I made.
Since the song mentions apples, I decided to go with a cute apple design and just put the blessing words in the center.  I keep this hanging in the dining room by the table as a friendly reminder for him to sing his blessings. Although, he loves to sing his blessings and we don't have to remind him very often, it's a cute way of having the words or the reminder available to him as he needs them!  :)  This apple design could be used for many different things...as a card for a teacher or just as a craft to make an apple!  I simply used card stock papers, cut the red into the shape of an apple, cut out a stem and leaf, printed out the blessing and glued everything together.  Simple as that.

_________________________________________________________________________________

Next, we made a very fun craft at Easter time that was a huge hit with grandmas!  Easter lillies are a favorite flower during Easter and spring, so we came up with a cute way to make them from some simple materials and my son's handprints!

Handprint Easter Lillies

Materials
  • white constuction paper
  • green and yellow pipe cleaners (I uses a thicker pipecleaner for the yellow to give it more of a "lilly" effect)
  • scissors
  • ribbons
  • pencil or pen
  • clear Scotch tape
Directions
  1. Trace child's hand on white construction paper and cut out.
  2. take pencil or pen and curl fingers of the hand outward.
  3. Connect one yellow and one grean pipe cleaner together at ends
  4. wrap handprint cut-out around the pipecleaners and the connection point and secure with tape
  5. Repeat steps 1 through 4 to make multiple flowers
  6. tie a few lillies together with ribbon to make a bouquet

These were a great gift to give to grandmas and aunts for Easter!  And my son loved the hands-on experience in making these!

__________________________________________________________________________________

Another fun craft we did for summer was a paper plate turtle.  It's a fun way to make a turtle out of things you have around the house! 

Paper Plate Turtles

Materials
  • white paper plate
  • green construction paper
  • glue
  • crayons/colored pencils
  • googly eyes (these aren't required...you can just as easily draw eyes on the turtle, but I had them from another craft, so we used them)
Directions
  1. Cut green construction paper into shape of turtle head and also 5 small pointed pieces for legs and tail.
  2. Color any pattern for a turtle shell on the bottom side of the paper plate.  (I chose a flower pattern since my son just made scribble lines for his "coloring")
  3. Glue head, legs and tail to the top side of the paper plate (the side you would eat off of).
  4. Glue googly eyes to the turtle's head (or color them on).

This was one of Jackson's favorite crafts...he plays with the turtle quite often!
__________________________________________________________________________________


In addition to these crafts, there are so many fun and exciting crafts that we have made, including handprint turkeys for Thanksgiving, handprint wreaths for Christmas and lots more! But these were just a few I wanted to share at this time.

*Note- Be sure to check back in the future, as I plan on updating my blog with lots more fun, inexpensive craft ideas!


Monday, December 6, 2010

I'm Dreaming of a "Green" Christmas....

With the Christmas season now in full swing, there are a few things that we can all do to be more environmentally friendly!  Here are just a few green tips that you can use:
  • Use things other than wrapping paper to wrap your gifts.  There are plenty of things around everyone's home that can be re-used to wrap a gift...old maps, newspaper, brown paper grocery bags and even your children's finger painting or drawings to add an extra special touch to a gift. And while I'm on the subject of wrapping papers...if you receive gifts with wrapping paper on them, do your best to recycle it and use it for your next year's gifts!!
  • Use alternatives to gift boxes.  While most gift boxes can be recycled or used for gifts the next year, you can also use things other than boxes to put gifts in that can be used by the receiver for other various things.  For example, use a basket...which can be used for many other purposes, or buy a reuseable grocery bag and put your gift in that (I'm sure the receiver of your gift would be happy to have a handy reuseable bag!). 
  • Use alternatives to bows and ribbons.  While we all want our gifts to look special, there are other ways to give the gift a special look without using wasteful bows and ribbons.  I like to use natural things of the season, like sprigs of holly or pine...they give a gift a festive look and are very eco-friendly!
  • Make gifts for your friends and family instead of buying them.  While it is much easier to just go to the store and pick up a gift, homemade gifts are often more thoughtful and definitely more eco-friendly!  Some things I suggest are homemade cookies or other baked goods (who doesn't love a good dessert...am I right??!!), or homemade soaps or candles (I've decided to make my homemade laundry soap and dish soap for my girlfriends this year!) or if you're experienced in knitting or crocheting, make a scarf/mittens/hat or even a sweater for the special people in your life.  Another great homemade gift idea that I've done in the past is to make up the dry ingredients to different things like cookies, breads, hot chocolate and even soups...it's a good way to give people a head start on making these things themselves using the stuff you've given them! Also, something that is always a great gift for family is pictures!  Pictures of your children, a family picture or a collage of memorable pictures are just a few ideas.
  • Be smart about your Christmas tree!!  When getting a Christmas tree, try to be as eco-friendly as possible.  While re-plantable trees are the best bet for being green, they are not often allowed in housing facilities and are often too big and bulky for a lot of small houses...or if you don't have a yard to plant them in, it doesn't do much good either!  If you like cut trees, then find a place willing to give vouchers for re-plantable trees in the spring.  And artificial trees are another eco-friendly way to have a tree.  You can reuse the same tree year after year! 
  • Use energy-efficient lights!  While they may be more costly, they are a great way of cutting down the electric bill and using less energy during a time when we keep them lit day and night....especially if you are a very festive person who loves to light your house on the inside and outside! 
  • Give to the less fortunate.  During a season of giving, it's important to remember those who do not have the means to buy things for their families or themselves.  A great way to give to the less fortunate and be "green" while doing it is to give your gently used items to clothing and toy drives. These places provide for families and individuals in great need.  There are many retailers and non-profit organizations collecting all kinds of gently used items this time of year.  So go through your stuff, your kids' stuff and provide the less fortunate people with things like clothing, coats, hats, gloves, scarves, and toys....not only will you be doing a good deed, but you will also be doing something environmentally friendly by putting your old items to good use!
These are just a few tips that I thought I would share with those of you looking for a way to have a greener Christmas this year!  Merry Christmas to you all and God Bless you and your families!

Wednesday, November 3, 2010

Homemade Granola

I love granola!!!  Maybe it's the hippiness that has been instilled in me or maybe it's just the taste and the fact that it's good for me, I don't know...but it is a staple in my diet!  My family and I eat granola a LOT...whether it be as cereal, as a snack, as a topping on our favorite yogurt or just mixed in with some fresh fruit...we consume large quantities!  It's also a great snack for parents and children alike who are on the go and need something quick and easy to eat!  I have found a great recipe that is fairly easy to make and tastes really good and allows me to have control of what goes in the granola that we eat!

Ingredients:
raw oats
ground flaxseed
ground wheat bran
(I also use ground hemp seed, but it is optional)
raw seeds (pumpkin, sunflower, sesame...whatever you have on hand)
slivered or sliced almonds, pecans or walnuts (this is optional and your choice as to which you want)
1/2 cup canola oil (this is what the recipe calls for, but I opt to use safflower oil)
1/2 cup peanut butter
splash of water
1/4 cup honey
1 tablespoon cinnamon
dried fruit (your choice....cherries, raisins, figs, blueberries, cranberries, etc.)

Directions:
Preheat oven to 325.
Spread raw oats onto one or two baking sheets/roasting pans.  I don't measure the amount that I use...just use enough to cover the bottom of the pan.  Then add plenty of flax seed, wheat bran, seeds and nuts.  (again, I don't measure these things, so I just add a generous portion of each...a little more of the thing I like...or just use what I have of any of these things)
Then mix together the oil, peanut butter, water, honey and cinnamon in a glass measure cup/bowl and microwave for approximately 1 minute...just to melt the honey and peanut butter a litte to make for an easier way to mix. 
Then stir the mixture into the dry ingredient on the baking sheet.
Bake at 325 for 20-30 minutes or so, stirring once or twice. 
Remove when toasted to a light brown.
When the granola is cooled, add the dried fruit.

*Note, I make a large quantity of this when I do make it and just divide it up into freezer bags for easy storage and and easy way to just grab on the go.  If you do freeze any, be sure that it is cooled completely before bagging it for the freezer.

Monday, November 1, 2010

Homemade Dish Soap

For those of you who enjoy saving money or like to make your own safe products for your home, you will love this!!  Now, not only can you make your own homemade laundry detergent, but you can now make your own dish soaps too!!!  For just fractions of the cost of buying store soaps and a few easy ingredients, you can make your own dish soap that is safe for your family and safe for the environment!!  I have a couple different recipes, depending on how you prefer to wash your dishes.  One is for washing dishes by hand in the sink and the other is for a dishwasher.

This first recipe is for a liquid soap that can be used for washing dishes in the sink by hand.

Ingredients:
1 cup liquid Castile soap
3 tablespoons water
scented oil of your choice (or you can buy a scented Castile soap, or even use lemon juice for an easy scent)

Combine the ingredients in a container of your choice...easy as that!!!  (I've seen it put in glass bottles with a metal spout for a fancier look, but I just pour it into an old dish soap container so I can re-use at the same time!!) 

*Note- For those of you who aren't familiar with the liquid Castile soap, it can be found in some grocery stores and in most health food stores. I have also found it online at Target, which also sells all kinds of the scented ones too and it's pretty convenient to buy it that way also.
 Aromatherapy  
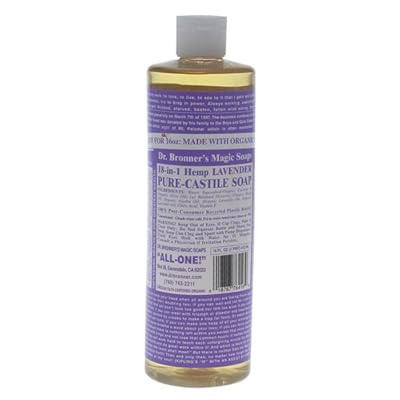
Here is a picture of the one I like to get which is lavender scented...it costs approximately $9 for this 32 oz. bottle, but if you do the math, you can get 4 cups out of just this bottle, which means you can make the soap 4 times with just one bottle..at an average cost of just $2.25 per mixture. And if you have ever bought organic dish soap from a store before, you will know that it costs much more than $2.25!!!


This next recipe is for a dishwasher soap.  (FYI..if you already make your own laundry soap, this is a great recipe because it uses the same ingredients!)

Ingredients:
(the amount of the ingredients really depends on how much you want to make)
1 part 20 Mule Team borax
1 part Arm & Hammer washing soda

Mix the borax and washing soda together in a bowl...be sure to break up any clumps.  Transfer into an air-tight container of your choice. (I just use a glass canning jar, as shown)

img_1374


And there you have it...two easy ways to make soaps for washing your dishes that are safe and free of lots of chemicals and also eco-friendly...at a fraction of the cost of regular dish soaps!  


Thursday, October 14, 2010

Finding Safe Products

Now that I've scared you (or hopefully at least made you aware of the dangers) with the videos about the chemicals in cosmetics and personal care products, I'm going to share a very useful resource to use for researching all of these chemicals and find out what's safe and what isn't and find manufactures who do produce safe products.  The website is http://www.safecosmetics.org/.  It's full of information that is necessary for any consumer wanting to buy safe products for their families.  Check it out!

Need Green Tips at Home?

If you're looking for a great resource with lots of information on green living....check out the book "It's Easy Being Green" by Crissy Trask.  Not only does it give you tons of tips for things you can do at home, at work or on the go for being eco-friendly, but it also gives lots of facts and information on how living green can impact the environment in a great way, it gives suggestions on how to go about getting involved in small ways to make an impact on the Earth conscious movement and it also gives lots of different resources (including stores, websites and organizations) who promote being green or who offer green alternatives to regular services.
It's Easy Being Green: A Handbook for Earth-Friendly Living

The Story of Cosmetics.